FAQ

All (technical) advice and treatment and the possible applications regarding the products on this website are given without obligation, and to the best knowledge and effort, as well as the current state of technology, without an obligation to create results and without any liability. We recommend that the prospective user determines the suitability of our materials and suggestions before adopting them on a commercial scale.

A1 Top layer

Using our A1 Triaxial fabric is an excellent way to strengthen A1. Two or more layers of A1 Triaxial fabric laminated in the A1 creates strong A1 objects. Unlike materials such as polyester and epoxy, the A1 does not absorb the glass fabric but clamps it between 2 layers of A1. The A1 in this case acts like a sandwich with the fabric sandwiched. That is why it is important to use sufficient A1 between the different glass fabric layers. Working too ‘dry’ results in a less strong end result and gives a greater chance of delamination (release of the different layers), which we want to avoid. Also on the very first layer before the 1st layer of glass fabric is applied (more than) sufficient A1 should be used to create an adhesion between the first layer and the glass fabrics.

In addition, we advice to apply the different glass fabric layers (alternating with A1 layers) directly after each other. Work wet in wet to get an optimal bond between the different layers.

A1 is known for its freedom of form and the post-processing of an object made with A1 often gives spectacular results. Our suggestion is a thickness of the top layer of at least 2 mm in order to give enough mass to the A1 to maintain sufficient adhesion on the underlying layer and sufficient strength to withstand weather influences such as UV radiation.

Top layer in a mould
When working in the mould, the 1st layer (called top layer) of A1 is important, as this is ultimately the visible layer. By using the A1 Thix A you can turn the A1 into a beautiful pasta. Because of the thickening, the A1 stays in place, even when working in a mould with vertical parts. To ensure this top layer has enough thickness we suggest the following working method:

  • Mix the A1 Liquid with the A1 Powder until a smooth mixture is obtained.
  • Add to the A1, mixture if desired, pigment in the right colour and/or other materials such as dried sand or metal powders.
  • Add A1 Thix A until the desired thickness (viscosity) is reached. The maximum percentage of A1 Thix A you can add is 2%. Adding more will eliminate the effect.
  • Apply the A1 top layer to the mould with a brush, for example. Keep a layer thickness of at least 1 mm.
  • After gelling of the top layer (normally between 20 – 30 minutes) we advise to continue working the next A1 (glass fiber reinforced) within 1 hour to keep the adhesion optimal.

A1 is not a coating material to protect other materials against weather influences.

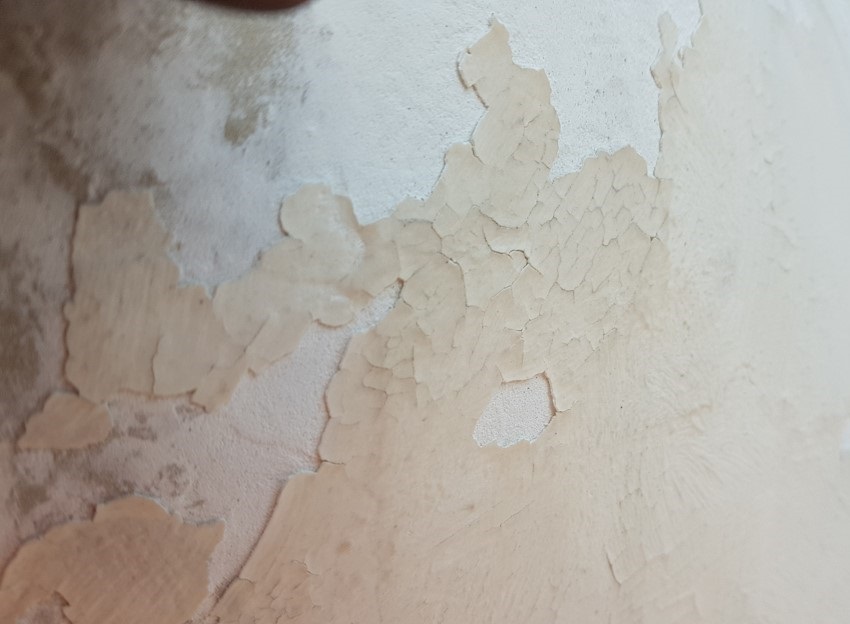
Regularly we are asked whether A1 can be used to weatherproof a sculpture made of plaster, clay or concrete blocks. Unfortunately, this is not recommended as A1 absorbs (to a limited extent) moisture and will transfer this moisture to the material that has to be made weatherproof. These materials eagerly absorb this moisture from the A1 without transferring it back to the A1 in dry conditions to evaporate.

This creates spots with a high continuous moisture load that weakens the connection between the A1 and the material it covers. At higher temperatures, the water evaporates or at low temperatures the water freezes. This creates so much pressure between the different layers that the A1 layer loses its bond with the underlying material. That is why we advise to only use (glass fabric reinforced) A1 or underlying materials that do not absorb moisture.

When applying 1 layer of A1 of 1 mm thickness you will use 1.75 kg A1 per m² (1 liter A1 = 1.75 kg).

In a mould you normally work with a first layer of 1 to 2 mm. Next, we advise to use 3 layers of A1 Triaxial fibre. In order to achieve this will have to apply 4 layers of A1 of 1 mm. Normally in a mould we thicken A1 for the first layer with Thix A. Make sure this layer is hardened before applying the next layers to avoid print through of the A1 Triaxial fibre. Use 1 layer of A1 between your hardened first layer and the first layer of A1 Triaxial fibre in order to make a proper bonding.

As an example needed for a project of 5 m²:

  • 2 mm 1st layer
  • 4 layers of 1 mm A1 in order to apply the 3 layers of A1 Triaxial fibre

Total 6 mm of A1 x 1.75 kg per layer x 5m² is 52,5 kg of A1, consisting of 17.5 kg A1 Liquid and 35 kg A1 Powder. Be aware that this is an indication and not a general rule.

Sealer and Coatings

A1 Sealer is enough but we advise to check periodically the surface on damages so it can be repaired. Depending on the area where the products are placed a new layer of sealer might be necessary every 3-5 years. The Sealer is available in Matt and Satin. High-gloss is not available.

A1 Top Finish is a 100% vapour permeable, high-quality waterborne impregnating agent based on silane/siloxane and penetrates deep within the surface and leaves a long-lasting water repellent effect. We suggest to add one layer of A1 Top Finish on the layers of A1Sealer PLUS to achieve extra water repellent effect and maintaining a damp open coating system.


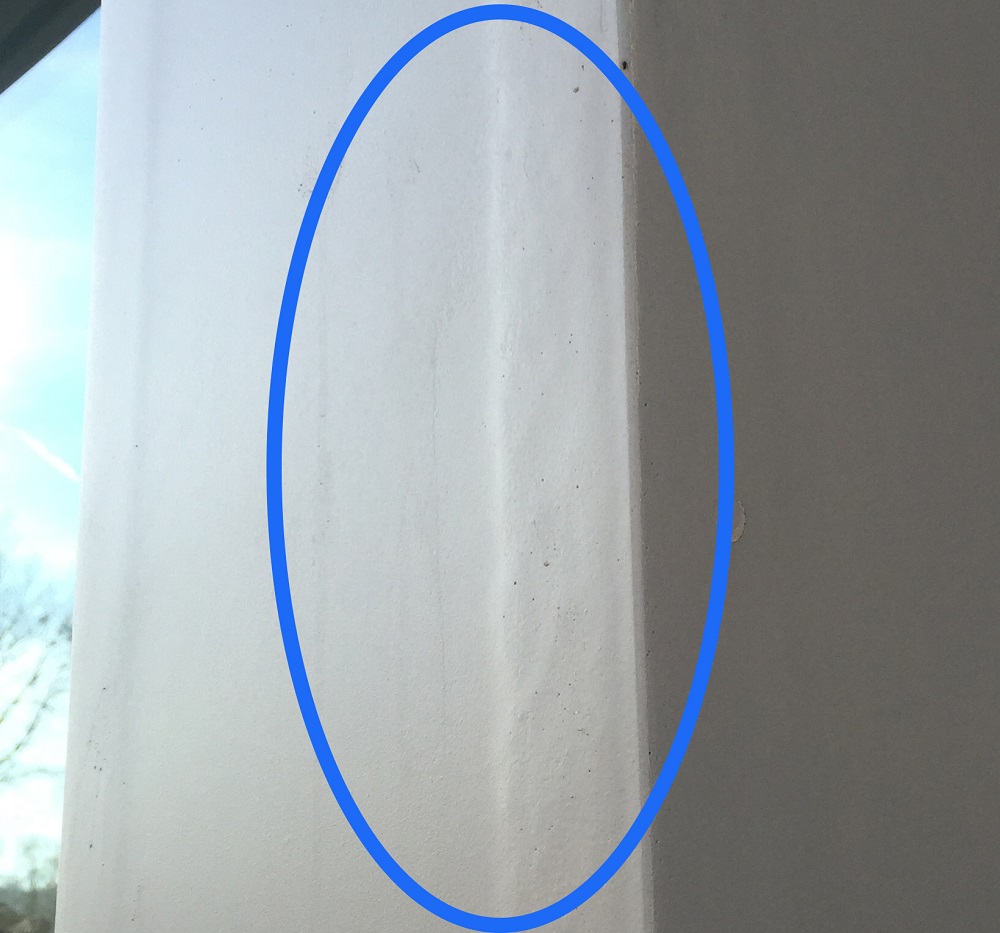
The A1 Sealer PLUS is not waterproof, but breathable. The brown colour is probably caused by the moisture in the soil. Two layers of A1 Sealer PLUS is usually sufficient, but with prolonged moisture loading, which is the case here, there is a risk of discolouration.

We recommend reapplying the A1 Sealer PLUS every 6 years. Furthermore, we recommend that you check the A1 object annually for possible damage to the A1 Sealer PLUS so that it can be repaired immediately. This inspection is also a good opportunity to clean the A1 object if necessary.

Fillers

Poraver (expanded glass) can be used as a filler for A1. This is a recycled lightweight glass ball that allows you to achieve a large volume gain. Add the grains little by little to the A1 base. Another good and inexpensive filler medium for A1 is dried (silver) sand. (available in the building materials department in your local DIY shop). The choice of filler depends on your preference in terms of weight, desired appearance and cost.

A combination of fillers and/or pigments is also possible.

First mix the A1 Liquid (1 part) with the A1 Powder (2 parts). Then gradually add the filler to the A1 (maximum 2 parts). Add A1 Diluent if desired. We recommend adding a maximum of 0.67 kg fillers per kilogram of A1 created, whereby the ratio is 1 part
A1 Liquid, 2 parts A1 Powder and 2 parts filler (all by weight).

The colour difference can be explained by the presence of water in the object just after unloading. The water in the A1 liquid reacts with the A1 powder, but part of this water remains behind as residual moisture. Over time, residual moisture will also evaporate, resulting in the A1 object becoming lighter in colour. This is especially visible in combination with sand such as you use.

A solution could indeed be the application of a sealer or transparent coating, which will again increase the colour intensity. Naturally, there will also be more shine. Let the A1 object dry thoroughly before applying the coating because the moisture still present in the A1 object at higher temperatures (for example due to the sun) will damage the coating.

Another solution can be to use a very small amount of pigment to give it a slightly stronger color.

The solution could also be to put the image outside without a coating. A very thin top layer will be weathered by UV, so the sand will come to the surface more, which will result in a more intensive colour. Light sanding unfortunately works a little less because we see it becomes lighter in colour. Careful sandblasting would be possible again.

Note: we recommend using 1 part A1 liquid, 2 parts A1 powder and a maximum of 2 parts sand.

Pigments

It is possible to use pigments from other suppliers to colour A1. In some cases, these pigments can affect the quality of the A1, ranging from slowing down/blocking the
curing process to decreasing the weather resistance. Hence our advice to test this in advance.

The base colour of A1 is ivory white. If desired, we have A1 suitable pigments in 10 colours with which the A1 can be coloured through and through. These pigments are highly concentrated and are added up to a maximum of 2% to the A1. Often a lower dose is sufficient to achieve the desired result. The A1 Pigments can be mixed with each other so that almost all RAL colours can be made.

A1 Triaxial fibre

A1, unlike polyester, does not absorb A1 Triaxial fibre but clamps it in between the different layers of A1. That’s why our glass fabric has an open structure that allows the different layers of A1 to connect to each other and to clamp in the A1 Triaxial fibre.

The best time to start laminating over the top layer is when it is drying but still feels slightly moist. immediately after the set time has expired. The best result is achieved when the laminating layers are applied wet to wet. An advantage of A1 is that after a few days you can still apply A1 with A1 Triaxial fi bre with a good adhesion. However, the substrate must first be coated with a wet layer of A1 before the A1 Triaxial fi bre can be applied.

Even with larger surfaces it can happen that the A1 already reacts (is hard) before a new layer of A1 Triaxial fi bre can be applied. This can be solved by applying a new thin layer of A1 or by slowing down the reaction time of the A1 using A1 Retarder.

Natural fibres are offered as an alternative to glass and basalt fabrics. A major disadvantage of these fibres is the tendency to absorb and retain moisture, which disturbs the moisture balance in the A1. This moisture absorption can also cause fungi to develop and eventually affect the A1 object. For outdoor applications, the use of natural fibres is therefore not recommended.

Sawing through a form

A1 has a processing time of about 20 – 25 minutes, after that the material is dry but still vulnerable. The advice to be able to saw and/or drill A1 properly is about a week as the A1 is (almost) finally cured. Sawing/drilling after 1 day is possible however be careful as the A1 object is not completely cured. You can use any sawing machine for this. Of course there is a difference in quality and skill of the machine. A water saw table or a dremel often give a nice result.
 
If you are not using hard fillers like sand it’s possible to trim with a jigsaw machine with a cutting blade for metals. Another option is a multi tool.
 
If the material contains sand you need a tile saw table (wet) or cutting machine with a tile saw blade.. For small parts a Dremel multi tool will work as well.
 

A1 and water - Moisture control

If the A1 object is constructed in such a way that the splash water can easily drain off and in combination with a good coating, we do not expect any problems. In places where the splash water can collect, we advise not to use A1.

We do not advise you to use A1 because A1 cannot stand permanently under water fo a long period, as A1 is vapour permeable.

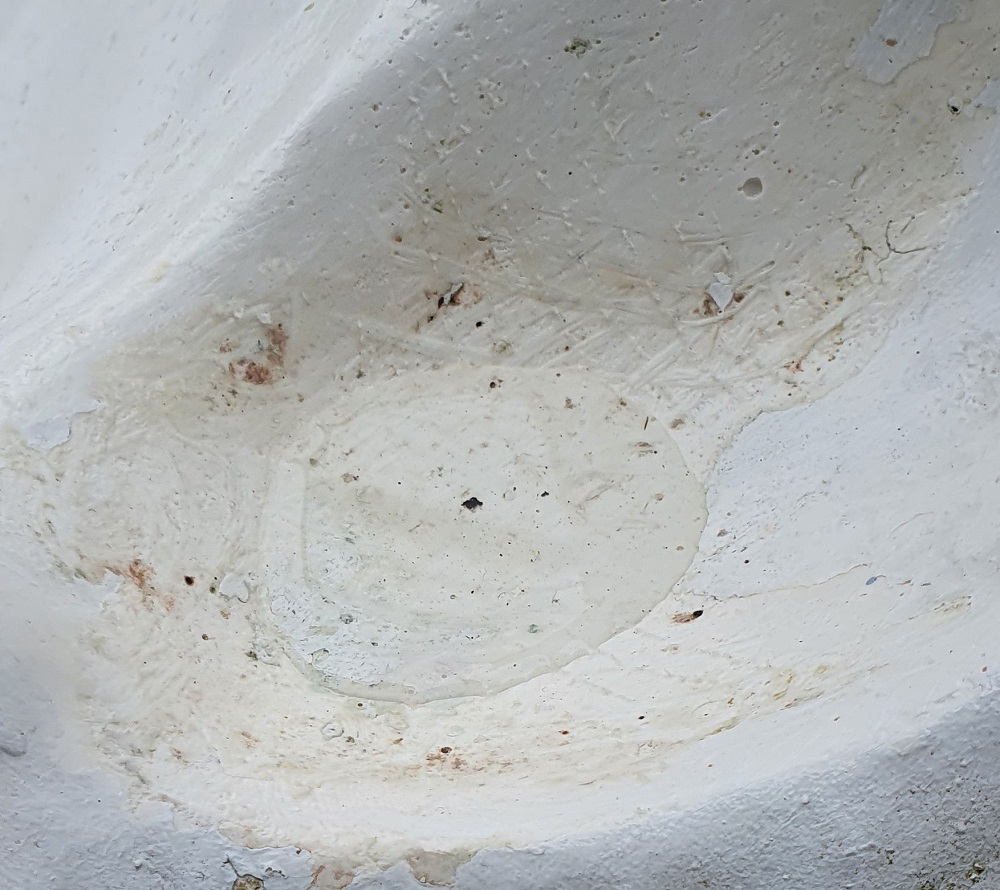
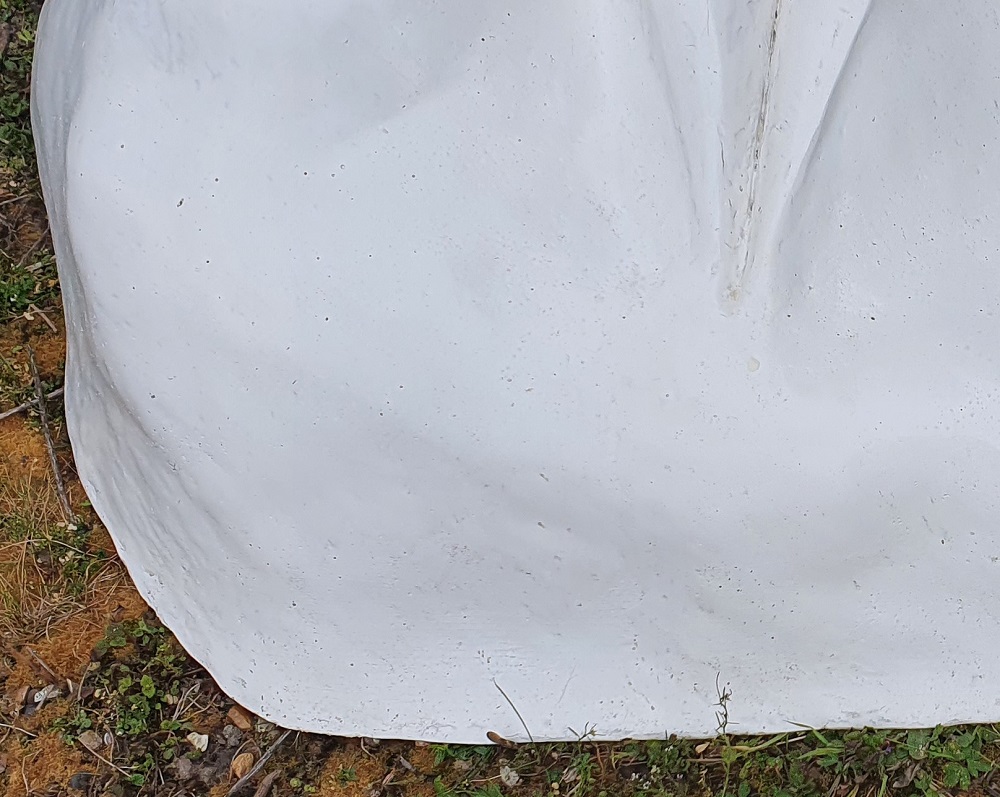
Be careful as the soap might react with the A1 or more likely the continuous water beneath the soap which is entrapped between the soap and the A1 soap holder will affect the A1.

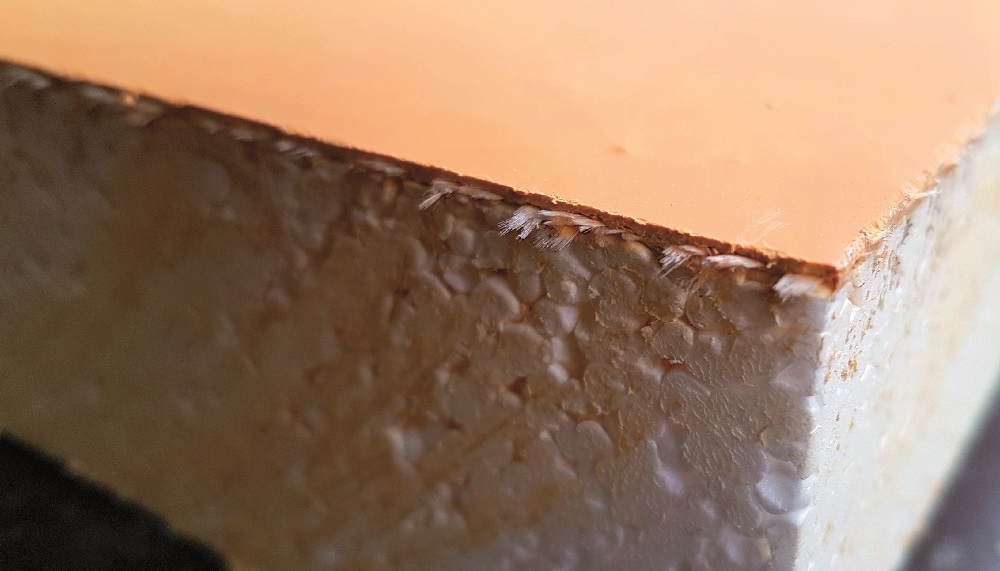
A1 wants to breathe and A1 attracts moisture and also releases it during dry periods. Therefore, the urgent advice not to disrupt this process by using a non damp open sealing paint or coating. The moisture still present in the A1 is converted into water vapor during warm periods and this can damage the coating system or the A1 top layer. A1 objects that are also not able to ventilate on the inside because of the use of, for example EPS, are extra vulnerable.

During the production process, moisture in the A1 liquid reacts with the A1 powder. A part of the moisture remains behind (residual moisture). Therefore, before an object is placed outside, it is important to make sure that the residual moisture has disappeared from the product. The duration of this depends, among other things, on the construction of the A1 object, the thickness of the laminate, the humidity present and the temperature of the storage location. Our advice is to give the A1 object the chance to evaporate the residual moisture in a covered area with room temperature for at least 7 days. At that time, the coating can also be applied.

A1 can withstand rain showers or an environment with a higher moisture load. In a situation where the A1 object is (very) long exposed to moisture, without the chance to dry again regularly, the top layer can become softer and in extreme cases even loosen from the underlying layers. That is why our advice is to ensure that (rain)water can always drain off the A1 object easily. Provide sufficient slope and avoid horizontal or badly sloping parts in the A1 object.

Our tests show that A1 objects can be placed outside for a long time with only a limited change on the outside. To extend this period by many extra years, we recommend applying a coating. This coating protects the A1 object because it absorbs the influence of weather conditions. Because A1 is a material that absorbs and releases moisture (breathable material), it is important to ensure that the coating system also has a breathable effect. The A1 Sealer PLUS is suitable for this, but also many wall paints such as KEIM Soldalan.


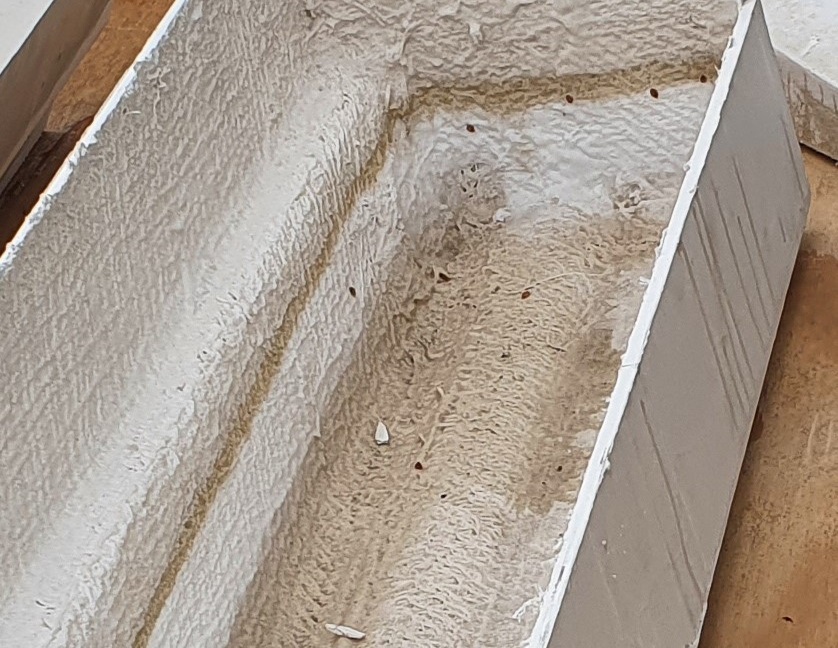
Very occasionally we come across A1 projects where the water can collect in. As long as this place is provided with sufficient protection, it will not be a problem for the A1 for a few days. For a longer period of time, this is something we really do not recommend. Similar to what we sometimes find on construction sites where A1 panels are stored before being mounted with the panels facing outwards with the wrong side up. This gives the rainwater every chance to collect and, because often no coating is applied to the rear, the water has every chance to penetrate into the A1. Constructively, this is not a problem for the A1 over a short period, but on the visible side, the places where the moisture has penetrated will soon be visible, even after it has dried.

A1 is excellent to use in combination with a large number of filling materials. It adheres excellently to, for example, wood, textiles and chicken wire. It is possible to add almost all small ground materials to the A1 mixtures, creating special shapes in appearance and structure.
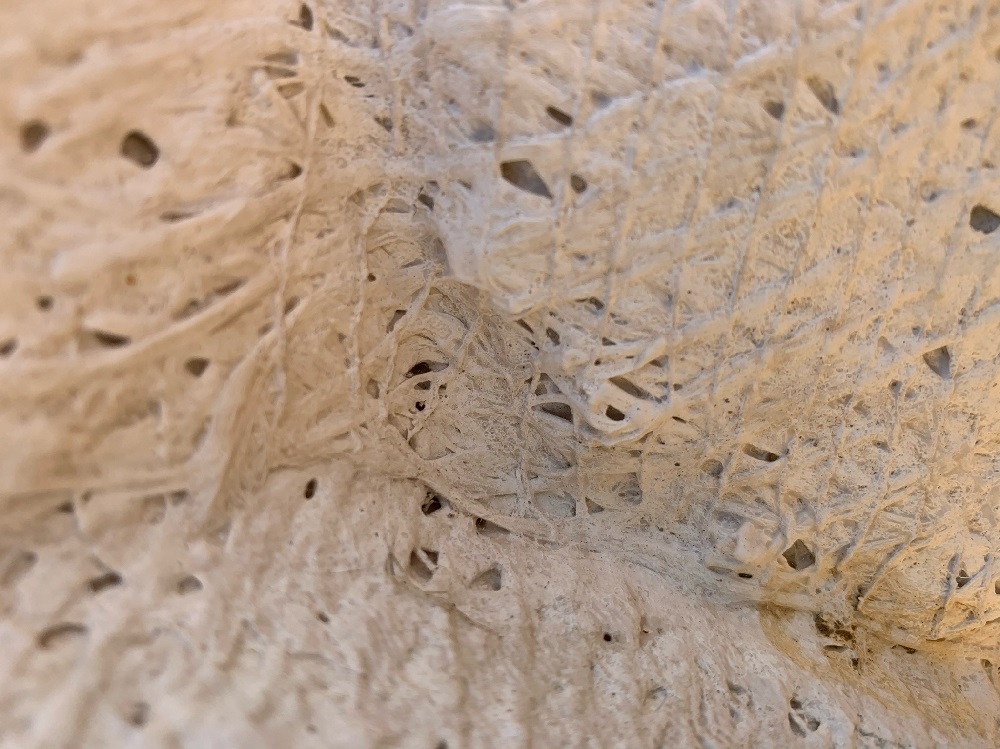
For A1 objects that are placed outside, carefully consider beforehand whether this combination of materials also works well here. For example, we know that wood attracts moisture via the A1 and can even expand, causing the A1 layer to crack. Chicken wire will start to rust due to the moisture present in the A1 and this creates traces of rust in the A1. We encountered A1 objects where hydro grains were mixed in the A1 because it gave a nice structure. Subsequently, these hydro grains absorbed so much moisture that the surrounding A1 became soft and the top layer of A1 with hydro grains subsequently separated from the underlying glass fabric reinforced A1 layers.

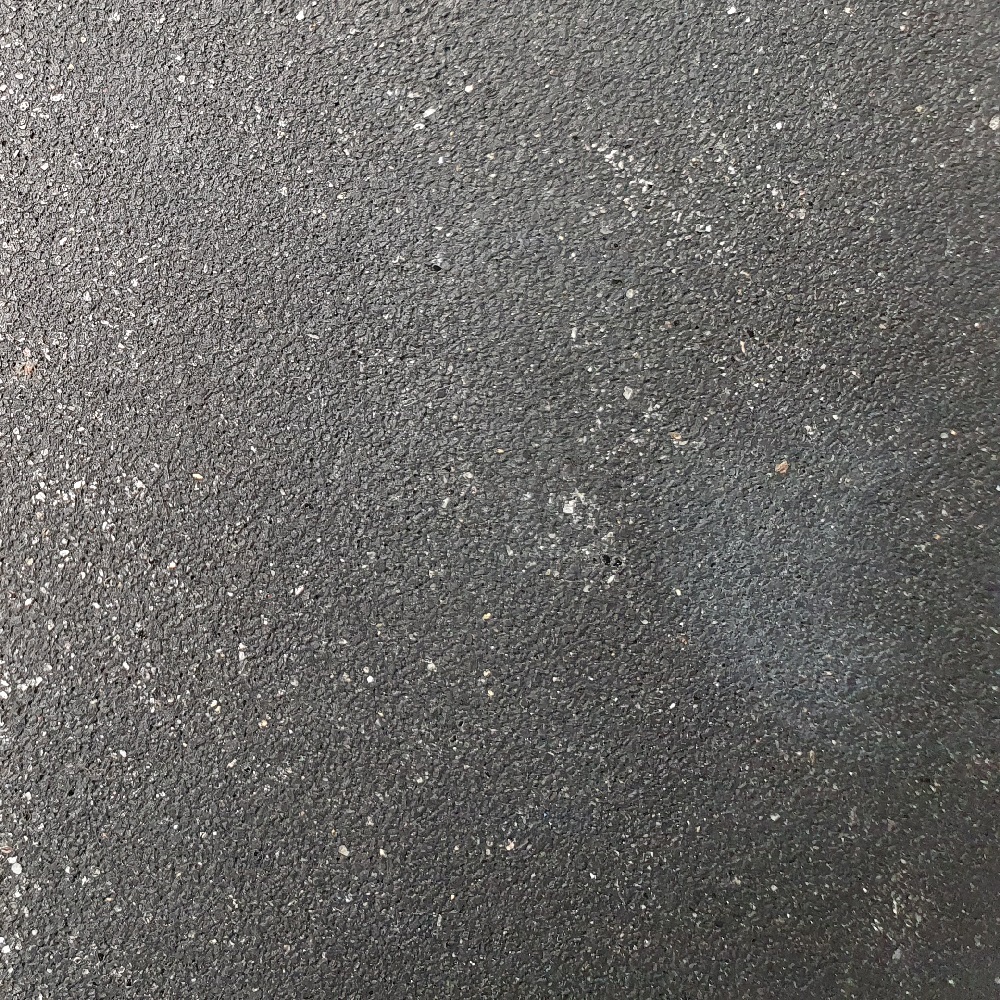
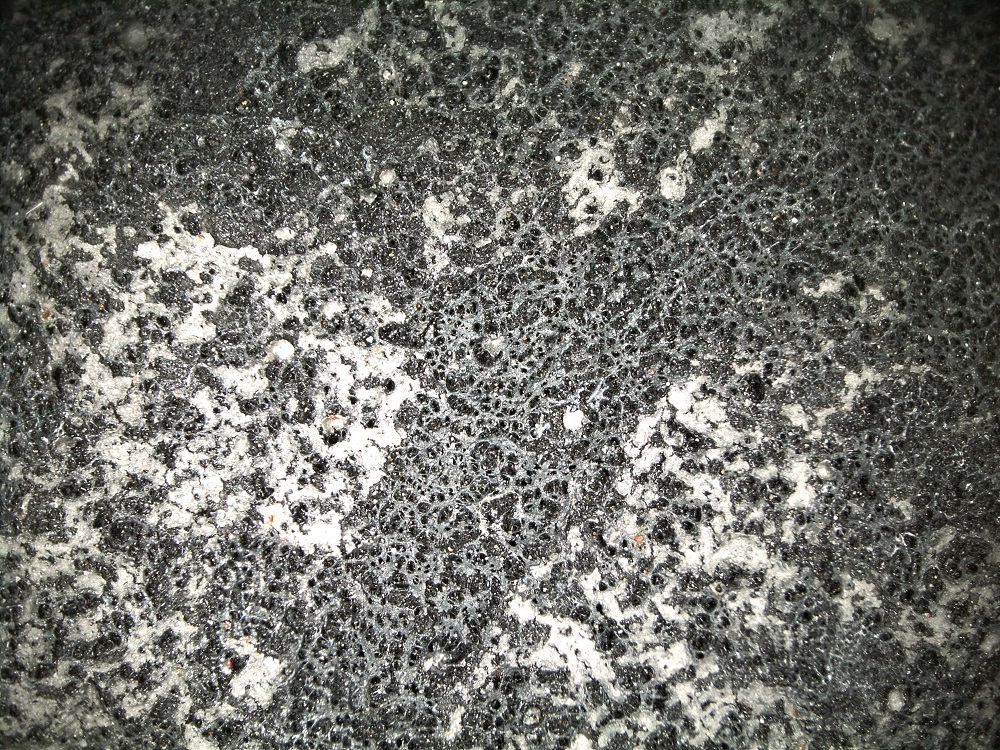
Only use filling materials that do not absorb moisture or that will not corrode due to the present moisture. We have had good experiences with materials that do not absorb moisture and rust, such as granite, sand, EPS (Styrofoam) and aluminium.

Reinforcement materials and inserts required for mounting can cause problems in outdoor situations when these materials absorb moisture such as wood. Better use aluminium, stainless steel, EPS or pre-produced reinforcement profiles or backs of A1.

Inspection & Maintenance

Even if the perfect A1 object has been made, it can happen that due to an external influence such as a collision, a storm or a very long period of moisture exposure, the object is (slightly) damaged, for example, at the coating or the A1 top layer. Therefore, inspect the A1 object for damage at least once a year. These can often be remedied quite easily.

With prolonged and intensive UV and moisture exposure, coating and paint systems require regular maintenance. From our tests we see that (particularly on the sunny side) the Sealer PLUS is also subject to erosion and as a result the protection of the A1 decreases. On our North side and in particular on the A1 objects placed close to the ground, we see an increase in alga deposits on the test panels. Cleaning the A1 object at least once a year (soft brush) and applying a new coating every few years provides extra protection for the A1 and thus extends its lifetime.

Magnitude of the same A1 panel after reaplying A1 Sealer PLUS.
Magnitude picture of A1 panels with A1 Sealer after 4 years on sunny side.
A1 object placed on the ground without any maintenance.
Same object after cleaning and applying layers of A1 Sealer PLUS.


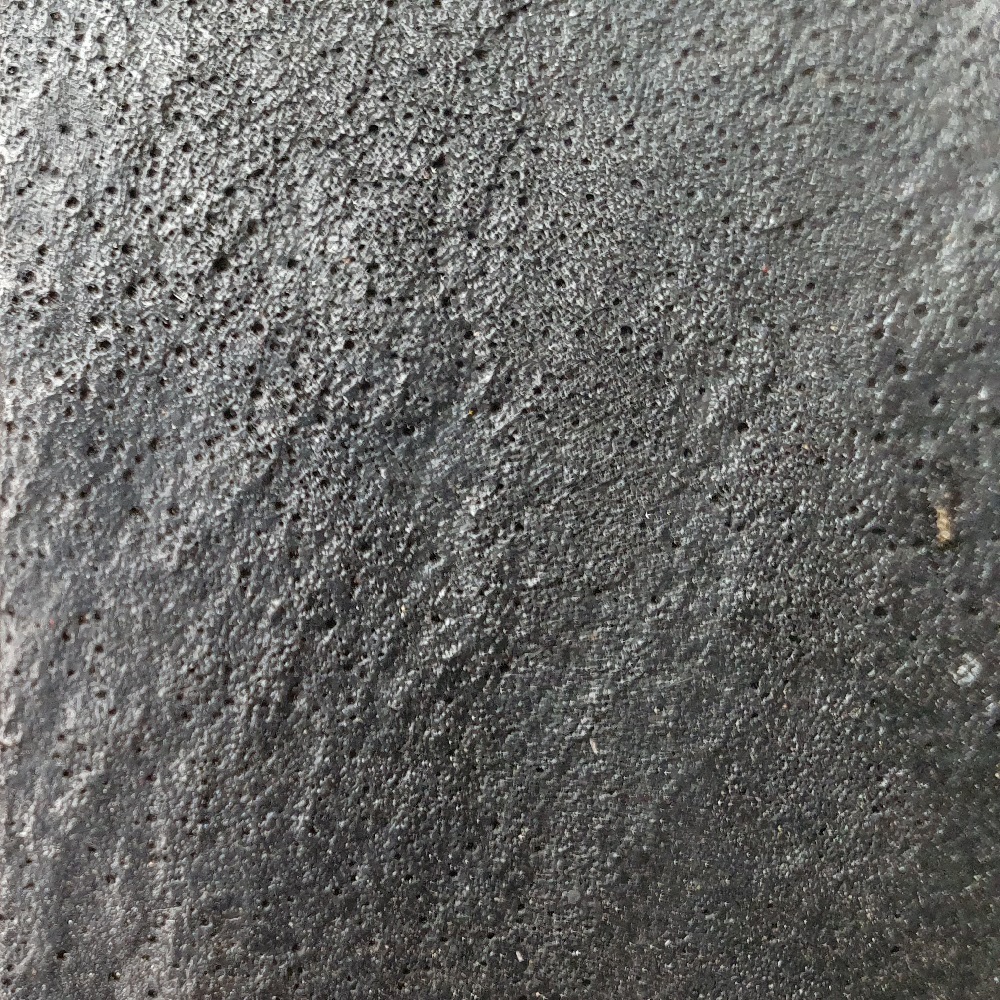
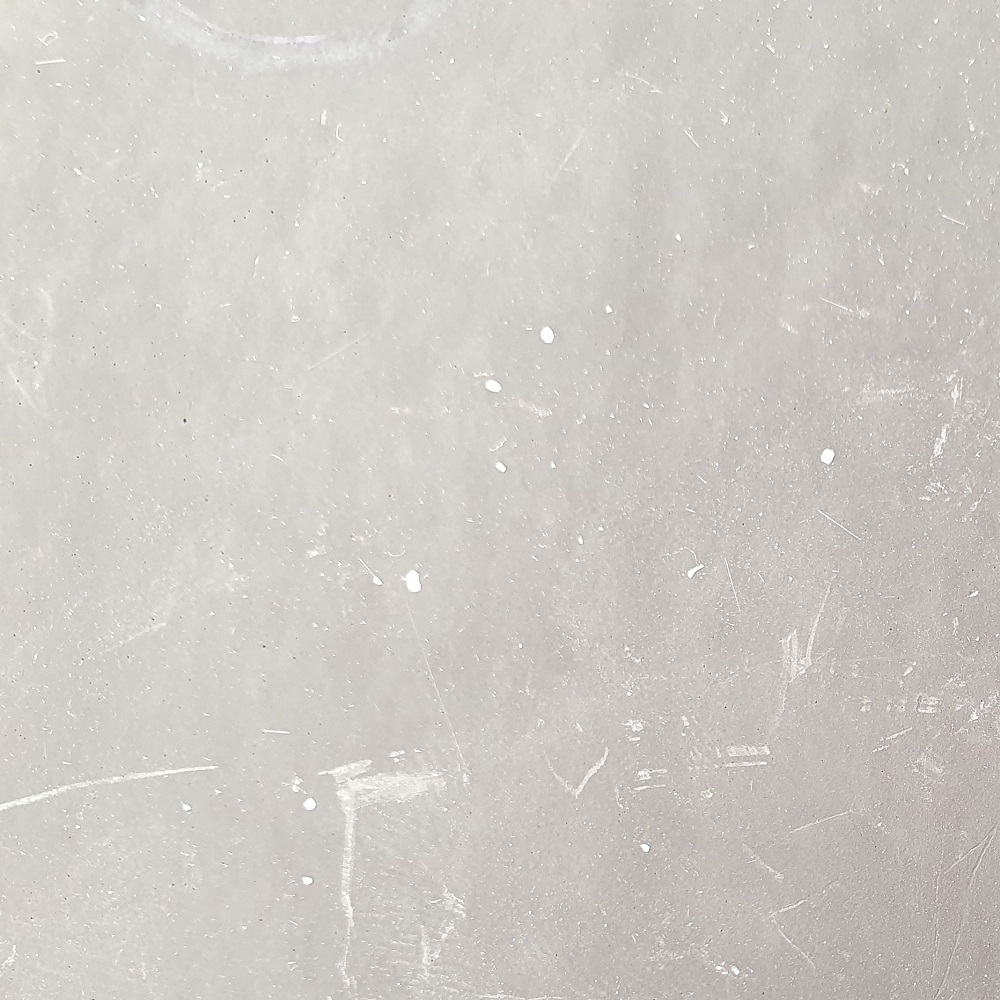
A1 is a mineral based product and will change aesthetics under the influence of UV and moisture. A1 objects that are not protected and placed in an outdoor environment will quickly lose a fraction of their top layer (is a fraction of a mm) with (often) the result that the object becomes more intensive in colour. Also after a rain shower A1 objects absorb moisture and therefore become darker in colour to become lighter in colour during a dry period. Accept A1 is a natural material and that these aesthetic changes are part of it. If the A1 object must remain colourfast, a coating or paint system can be a solution.

A1 panel directly after demoulding.
A1 panel after 5 years of weather exposure.
A1 panel with sand directly after demoulding.
A1 panel with sand after 5 years of weather exposure.

Moulds

We would not advise you to use A1 in a plaster mould as there will be a very strong bond between the A1 and the plaster and you will most likely not be able to get the A1 loose from the plaster mould.

We would advise you to use a silicone mould instead of the plaster mold. Due to the minimal expansion of A1, the A1 will press into the silicone mould and you will get an exact impression of the mould.

Questions are under construction

Connecting parts, with all kind of materials, is always a tough job. For the best advice, please contact us via info@acrylicone.com or call +31 187 663006.

NL: Advies wordt gegeven om voor de huid alginaat te gebruiken. Alginaat is een volledig natuurproduct op basis van zeewier. Je koopt het in poedervorm en maakt het lauw warm water (verhouding zie verpakking) verkrijgbaar in verschillende droogtijden.

Met de aangemaakte alginaat maak je een afdruk van het gewenste huiddeel, omdat het een hele korte droogtijd heeft, ontstaat er snel krimp en is de malafdruk ook maar 1 keer te gebruiken. Zorg vooraf dat je A1 in de benodigde hoeveelheid afgewogen klaar hebt staan zodat je alleen de A1 nog hoeft te mixen en gelijk de mal kunt vullen.

Vervolgens kun je indien gewenst van deze 1e afdruk een siliconen mal maken voor een hogere oplage van de afdruk.


EN: Advice is given to use alginate for the skin. Alginate is a completely natural product based on seaweed. You buy it in powder form and mix it with lukewarm water (ratio see packaging). Alginate is available in different drying times.

With the created alginate you make an impression of the desired body part. Because the alginate has a very short drying time, shrinkage occurs quickly and the mold impression can only be used once. Make sure you have enough A1 weighed in the required amount ready in advance so that you only have to mix the A1 and immediately fill the mould.

If desired, you can make a silicone mould of this 1st print for a higher print run.

NL:

Als vulmiddel voor A1 kun je poravor / expanded glass gebruiken. Dit is een gerecycled lichtgewicht glasballetje waarmee je een groot volume winst kunt maken. Hiervan kun je maximaal 1/3 toevoegen boven op de afgewogen hoeveelheid Acrylic One. Voeg de korrels beetje bij beetje toe aan de basis om controle te behouden over de gietbaarheid. Dit is niet geschikt voor exterieur toepassingen

Een ander goed en voordelig vulmiddel voor A1 is gedroogd zilverzand. (verkrijgbaar bij iedere bouwmarkt op de cement afdeling) hiervan kun je 2/3 toevoegen boven op de afgewogen hoeveelheid A1. Het zand kun je vooraf vermengen met het poeder van de A1.

De keuze voor het vulmiddel hangt af van je voorkeur naar zwaar of juist lichtgewicht.

EN: You can use poravor / expanded glass as a filler for A1. This is a recycled lightweight glass ball with which you can make a large volume profit. You can add a maximum of 1/3 of this on top of the weighed amount of A1. Add the granules to the base a little at a time to maintain control over pourability. Poravor is not suitable for exterior applications.

Another good and inexpensive filler for A1 is dried silver sand (available at any hardware store in the cement department). You can add 2/3 of this on top of the weighed amount of A1. You can pre-mix the sand with the powder of the A1.

The choice of filler depends on your preference for heavy or lightweight.

NL: Voor het gebruik van de hoeveelheid metaalpoeder, is er geen garantie in het behalen van resultaat. 2/3 van de totale hoeveelheid op gewicht is de maximale toevoeging, maar minder mag en kan dus ook. Neem voor exterieur toepassingen altijd contact op met 1 van onze adviseurs (info@acrylicone.com).

EN: For the use of the amount of metal powder, there is no guarantee in achieving results. 2/3 of the total amount by weight is the maximum addition, but less is allowed and is also possible. For exterior applications, always contact one of our advisors (info@acrylicone.com).

NL: Het gebruiken van een gipsmal in combinatie met A1 is een moeilijke combinatie waardoor het verloren gaan van de mal bijna altijd een gevolg is. A1 en gips hebben een grote hechtende en vocht ontregelende  werking op elkaar waardoor lossing zeer moeizaam verloopt, om dit te voorkomen  kun je de gipsmal insmeren met schellak of een andere afsluitende coating. Daarna gebruik je een “gewoon” losmiddel en dan is er door de tussenliggende loslaag een mogelijkheid om de gipsmal te behouden.
Tevens is het lossend maken van de vormdelen van groot belang. Vaak zijn er meerdere hoogtelijnen dit zorgt voor meer delingen van de mal. Het meest ideale materiaal voor A1 is een siliconen mal, flexibel en makkelijk van de gegoten vorm af te nemen. 

EN: Using a plaster mould in combination with A1 is a difficult combination, which almost always results in the loss of the mould. A1 and plaster have a great adhesive and moisture-disrupting effect on each other, making release very difficult. To prevent this, you can apply a coating in the plaster mould with shellac or another sealing coating. Then you use a “normal” release agent and then there is a possibility to keep the plaster mould due to the intermediate release layer.

It is also of great importance to make the moulded parts releaseable. Often there are several contour lines, which results in more divisions of the mold. The most ideal material for A1 is a silicone mould, it is flexible and easy to remove.

NL: E.e.a. hangt af van de gebruikte vulmiddelen en pigmenten. Bij een object wat is overgeschilderd volstaat het bijwerken met A1 en vervolgens een laag van de gebruikte coating. Bij objecten waar de A1 is ingekleurd door middel van zand, metaalpoeders of pigmenten moet er rekening gehouden worden met mogelijk zichtbare reparatie plekken. Met name bij het gebruik van A1 met pigment is het advies om voor aanvang project een wat grotere hoeveelheid pigment op kleur te maken zodat de kleurverschillen minimaal zullen blijven. Echter doordat A1 een water gedragen product is kunnen er altijd kleurverschillen ontstaan. Door toevoeging van meer of minder pigment, zand of metaalpoeder kun je naar de optimale kleur toe werken. Dit kun je het beste vooraf testen.

EN: This depends on the fillers and pigments used. With an object that has been painted over, it is sufficient to touch up with A1 and then a layer of the used coating. For objects where the A1 has been colored by means of sand, metal powders or pigments, possible visible repair spots must be taken into account. Especially when using A1 with pigment, it is advisable to make a slightly larger amount of pigment to color before the start of the project, so that the color differences will remain minimal. However, because A1 is a water-based product, color differences can always occur. You can work towards the optimal color by adding more or less pigment, sand or metal powder. It is best to test this beforehand.

NL: Het patineren van metaalpoeders is een oncontroleerbaar proces, de oxidatie bepaald het resultaat en zorgt voor de mogelijke verrassing. A1 kan zowel warm als koud worden gepatineerd. Gebruik bij warm patineren een klein vermogen brander (omdat alleen de metaaldelen dienen te worden verhit).

Mogelijke warme patina voor brons; kopersulfaat / nitraat. Mogelijke koude patina voor brons; zwavel lever. Natuurlijk zijn er vele mogelijkheden in patineren en kleur uitstraling. Wat andere kunstenaars werkend met A1 en metaalpoeders veel gebruiken is ammoniak en zoutzuur, beiden los van elkaar te vernevelen in plantenspuit. Advies is om dit patina buiten te verwerken met evt. bescherming i.v.m. mogelijke ontstane dampen. Natuurlijk is het zeer wenselijk alles eerst te testen.

Tevens is het mogelijk om A1 te pigmenteren waardoor de ondertoon al in de gewenste kleurstelling komt. Bv bij het patina zwavel lever (voor donker brons) kan de A1 worden gepigmenteerd met zwart pigment.

EN: The patination of metal powders is an uncontrollable process, because the oxidation determines the result and provides the possible surprise.
A1 can be patinated hot or cold. When patination is warm, use a small power burner (because only the metal parts need to be heated).

Possible warm patina for bronze; copper sulfate / nitrate.
Possible cold patina for bronze; sulfur liver. Of course there are many possibilities in patination and colour appearance.

Also artists who work with A1 and metal powders often use is ammonia and hydrochloric acid, both of which can be atomized separately in a plant spray. It is advised to process this patina outside with a protection in connection with possible fumes. Of course it is highly desirable to test everything first.

It is also possible to pigment A1 so the undertone already comes in the desired colour combination. Eg. with the patina sulfur liver (for dark bronze) the A1 can be pigmented with black pigment.

NL: De A1  zal wel uitharden, echter de vraag is de toepassing in deze.

Als je een mal maakt van het klei prototype zul je na het aanbrengen van een 1e laag A1, de volgende laag moeten verstevigen met het Triaxiaal weefsel (minimaal 2 lagen) daarbij goed lettend op het lossend vermogen. Hierdoor zul je misschien in delen moeten werken.

Persoonlijk vind ik het verwijderen van de klei een onaangenaam werkje, afhankelijk van zijn soort geeft de klei sporen en aanslag op de A1.

Om in een mal van A1 dan weer een goede afdruk in A1 te maken heb je een goed losmiddel nodig, anders hechten deze zeker en vast aan elkaar 

Als je A1 wilt gebruiken om permanent over een klei beeld heen te zetten, adviseer ik je beter te kiezen voor een ander materiaal prototype, bv van EPS (piepschuim) daar dit materiaal een veel betere hechting heeft en geschikt is voor binnen en buiten gebruik. Eventueel voorzien van constructie in rvs, aluminium of  geïmpregneerd hout. Let hierbij wel op dat er altijd EPS aanwezig moet zijn op alle constructie materialen zodat er geen direct contact is tussen deze materialen en A1. Dit is nodig om zoveel mogelijk aftekening te voorkomen.

EN:  The A1 will cure, but the question is the application in this.

If you make a mold of the clay prototype, after applying a 1st layer of A1, you will have to reinforce the next layer with the Triaxial fabric (minimum 2 layers), paying close attention to the releasability. Because of this you may have to work in parts.
Personally, I find removing the clay an unpleasant job, depending on its type, the clay leaves traces and deposits on the A1. In order to make a good impression in A1 in a mould of A1, you need a good release agent, otherwise they will adhere securely to each other

If you want to use A1 to permanently put over a clay sculpture, I advise you to choose a different material prototype, e.g. EPS (styrofoam) as this material has a much better adhesion and is suitable for indoor and outdoor use. Optionally provided with construction in stainless steel, aluminum or impregnated wood. Please note that EPS must always be present on all construction materials so that there is no direct contact between these materials and A1. This is necessary to avoid as much signage as possible.

NL: A1  is een kunststof hars op waterbasis, die zich op vele manieren laat verwerken. Massief gieten, rotatie gieten, lamineren in een mal en lamineren over een object zijn o.a. de mogelijkheden in werktechnieken. Voor rotatiegieten is A1 ROTO beschikbaar, deze versie is beter geschikt dan de standaard A1 versie. Voor A1 ROTO neem alsjeblieft contact op met info@acrylicone.com of bel +31 187 663006.

Voorbeeld van rotatie gieten met A1 :  https://www.youtube.com/watch?v=yuaSgeIwZxA

EN: A1  is a water-based resin that can be processed in many ways. Solid casting, rotational casting, lamination in a mold and lamination over an object are, among other things, the possibilities in working techniques. A1 ROTO is available for rotational molding, this version is better suited than the standard A1 version. For A1 ROTO please contact info@acrylicone.com or call +31 187 663006.

Example of rotational casting with A1: https://www.youtube.com/watch?v=yuaSgeIwZxA

NL: A1 heeft geen certificaat van goedkeuring van levensmiddelen en daarom raden we het af om A1 voor voedsel te gebruiken.

En omdat A1 water opneemt (en vervolgens weer afstaat) is het niet geschikt voor voedsel. Vlekken zullen in de A1 trekken en zijn vervolgens niet meer te verwijderen. Ook is A1 niet geschikt voor bijvoorbeeld de vaatwasser.

Een afsluitend coatingsysteem zou dit wellicht kunnen verhelpen maar omdat we afraden om A1 voor voedsel te gebruiken hebben we hier geen ervaring mee. Bij commerciële doeleinden zul je teveel vragen krijgen en raden we dit dus echt af. 

EN: A1 does not have a food approval certificate, so we do not recommend using A1 for food.

And because A1 absorbs water (and then releases it again), it is not suitable for food. Stains will penetrate the A1 and can no longer be removed. A1 is also not suitable for, for example, the dishwasher.

A sealing coating system could perhaps remedy this, but because we do not recommend using A1 for food, we have no experience with this. For commercial purposes you will get too many questions and we do not recommend this.

A1 can be heated to approximately 120/140ºC after curing.

De A1 Liquid en de A1 Powder zijn op elkaar afgestemd. Elke batch heeft zijn eigen uithardingstijd. Het kan dus zijn dat wanneer je 2 verschillende batches gebruikt de onthardingstijd wordt ontregeld. Dit kan betekenen dat de A1 sneller uithard, langzamer uithard of helemaal niet. Daarom is het verstandig om de A1 vooraf te testen.

For a concrete look we normally use a combination of A1 pigment and coloured (black or grey) sand. This video https://www.youtube.com/embed/yg2hY2KjjrQ?wmode=opaque&autoplay=1 might give you some ideas how to make your own concrete look.

To get a consistent colour adding first the pigment to the whole batch of A1 Liquid is necessary. However do not forget to stir first before you take any liquid as the pigment will settle to the bottom. 

NL: A1 zal prima hechten op papier en zou in principe gebruikt kunnen worden voor papier-maché alhoewel wij hier zelf geen ervaring mee hebben. Let wel op dat na het mengen met het papier het object NIET meer geschikt is om buiten te plaatsen omdat het papier teveel vocht zal aantrekken.
 
Juiste verhoudingen e.d. zijn bij ons niet bekend maar zijn waarschijnlijk vrij eenvoudig zelf te bepalen.
 
EN: A1 will adhere well to paper and could be used for papier-mâché, although we have no experience with this ourselves. Please note that after mixing with the paper, the object is NOT suitable for outdoor use because the paper will attract too much moisture.

Correct proportions, etc. are not known to us, but are probably easy to determine yourself.

NL: Het is inderdaad mogelijk om er een plantenpot van te maken. Wel belangrijk om de binnenzijde te beschermen met een coating, pot, plastic, o.i.d. zodat er geen langdurig water bij de A1 kan komen. Op langer termijn zal hierdoor namelijk de (toplaag) A1 zacht worden.
 
EN: It is indeed possible to make a plant pot out of it. But it is important to protect the inside with a coating, a pot, plastic, or something similar, so no water can reach the A1 for a long time. Because in the longer term, this will cause the (top layer) A1 to become soft.

Drying time depends on the thickness of the object but we would recommend for smaller objects about 7 days of drying time to make sure most of the moisture has disappeared. We always recommend using a damp-open paint system so any moist left in the A1 object still can vaporize.

A1 will not get mouldy, but we suggest to demould the A1 from the alginate mould after at least 1 hour and maximum 3 hours to avoid water spots.

If the object only stays indoors you can use almost every paint available as long as it has good adhesion to the A1 (perform a little test).

For outdoor use damp-open wall paint. Do not use a sealer over the paint systems as you will close the damp openness of the paint again.

Het kleurverschil is te verklaren door de aanwezigheid van water in het object net na het lossen. Het water in de A1 liquid reageert met het A1 Powder, maar een deel van dit water blijft achter als restvocht. Na verloop van tijd zal ook restvocht verdampen met als resultaat dat het A1 object lichter van kleur zal worden. Zeker in combinatie met zand is dit goed zichtbaar.
 
Een oplossing zou het aanbrengen van een sealer of transparante coating kunnen zijn wat de kleurintensiteit weer zal verhogen. Er zal dan vanzelfsprekend ook meer glans verschijnen. Laat het A1 object wel eerst goed drogen voordat je de coating aanbrengt, omdat het nog aanwezige vocht in het A1 object bij hogere temperaturen (bijvoorbeeld door de zon) de coating zal beschadigen. 
 
Een andere oplossing kan het gebruik van een heel klein beetje pigment zijn waardoor het een iets sterkere kleur krijgt.
 
De oplossing zou ook kunnen zijn om het beeld zonder coating buiten te zetten. Een hele dunne toplaag zal dan door UV verweren waardoor het zand meer aan de oppervlakte komt, wat zal resulteren in een intensievere kleur. Licht schuren werkt helaas iets minder omdat we zien dat het dan juist lichter van kleur wordt. Voorzichtig zandstralen zou weer wel kunnen.

Er kunnen een paar oorzaken zijn, namelijk:

  1. Er is teveel lucht in de A1 geslagen tijdens het mixen. Tik met je hand een paar keer tegen de pot of tik met de pot op een vlakke ondergrond. De grote luchtbellen zullen naar de oppervlakte komen. Wat ook kan helpen is om de aangemaakte A1 een paar minuten te laten staan voor het te gebruiken.
  2. Te snel en/of in 1 keer ingegoten. Giet langzaam en in delen de A1 in. Tijdens het ingieten tik je voorzichtig tegen de mal, ook hier zullen eventuele luchtbelletjes naar de oppervlakte komen.
  3. Te hard en teveel geklopt. Klop na het volledig ingieten van de A1 niet teveel en niet te hard tegen de emmer hierdoor willen de luchtbellen zich afzetten tegen de mal.

Afhankelijk van de sterkte die benodigd is en de hardheid van de ondergrond kan er gekozen worden voor enkel C-vlies gebruik. Voor objecten buiten adviseren we altijd om minimaal 2 lagen triaxiaal weefsel te gebruiken en het C-vlies alleen te gebruiken voor een egalere afwerking.

A1 is te kleuren met de vloeibare kleurpigmenten van A1, zie voor kleurmogelijkheden de webshop (shop.acrylicone.nl) van A1. Deze pigmenten zijn onderling te mengen.

Indien je gewend bent om met poederkleur pigmenten te werken, dan behoren deze ook tot de mogelijkheden gebaseerd op eerdere ervaringen van andere kunstenaars. Echter adviseren we dit toch vooraf te testen.

Het mengen van acrylverf met A1 is alleen mogelijk (mits getest) voor binnen gebruik. En bij zeer kleine hoeveelheden (maximaal 2%) acrylverf omdat anders de eigenschappen van het materiaal te veel veranderen. Voor buitentoepassing is dit zeker niet toepasbaar, zonder risico op problemen op korte of langere termijn.

Voor binnen toepassing behoort dit tot de mogelijkheden, test altijd wel de hechting van de verf. Voor buitentoepassing altijd informeren naar de mogelijkheid bij de gespecialiseerde verf leverancier en na het doen van een hechtingstest.

Daarnaast is het af te raden om een afsluitende coating te gebruiken bij objecten die niet aan de achterzijde kunnen ademen. Dit is o.a. bij objecten van bijvoorbeeld EPS (piepschuim) die bekleed zijn met A1. Hierbij kan het beste gebruik gemaakt worden van een hoogwaardige exterieur muurverf zoals KEIM Soldalan. Houd hierbij wel rekening met de voorschriften van de verffabrikant. Voor buitentoepassing is het wederom hetzelfde probleem die ademende werking van A1 kan verstoren.
Indien men toch kiest voor dergelijke verf of afsluitende lak (mat of hoogglans) adviseren we naast testen op de volgende belangrijke punten (eerder door andere kunstenaars gedaan) te letten op:

  1. Maak het object binnen;
  2. Laat het object volledig drogen en uitharden;
  3. Het object kun je na ongeveer een week beschilderen (droogtijd op advies van de verf leverancier);
  4. Vervolgens het object aflakken (droogtijd op advies van de leverancier);
  5. Na drogen kan het object pas naar buiten.

Het nadeel van deze keuze is dat er bij een beschadiging in de lak een opening kan ontstaan waardoor de A1 zal gaan ademen. Met als gevolg dat het zijn vocht onvoldoende kwijt kan en dat zorgt voor de nodige problemen.

A1 adviseert voor buitengebruik de pigmenten met de vloeibare A1 pigmenten en bij beschildering achteraf de verf Keim Soldalan. Dit is een ademende verf.

Voor het aanbrengen adviseren we het object licht op te ruwen/schuren, voor een betere hechting. Meer informatie over de verf is te vinden op www.keim.nl
(deze verf is getest voor en door A1).

Tot op heden is de SEALER PLUS de speciaal voor A1 gemaakte ademende coating voor A1, verkrijgbaar in Gloss, Matt en Satin.

Using a sponge is an excellent and easy method for getting a smoother surface after laminating. For the best result: only use a little of water (moist not wet!). Too much water will make the layer of A1 weaker. Start using the sponge at the moment the curing of A1 starts. After an hour the A1 will become to hard to use a sponge and other sanding materials are advised. Be gently at the beginning of the curing process.

The A1 liquid mixed with the A1 powder results in a non-transparent end product, so it not possible to create a transparent A1 end product.

There are various metal powders available which can be added to the A1 to achieve a metal effect.

When you would like to achieve a rusted effect, use the iron powder. Add an equal amount of iron powder as the amount of powder used to produce Acrylic One. When the applied layer had dried, it needs to be sanded using a wet scoured or waterproof sanding paper. The surface can now be treated with hydrochloric acid, ammonia or any other agent of your choice. This accelerates the rusting process.
When the desired effect is achieved, the process can be stopped by using water and soda. To make sure the effect is maintained, a sealer can be applied. If the sealer is not applied, the process will continue as it would do naturally.

In order to achieve a bronze effect, an equal amount of bronze power needs to be added to the A1 as the amount of powder used to produce the Acrylic.
When the applied layer has dried, it can be sanded using a wet scoured or waterproof sandpaper. This brings the bronze particles to the surface.
The surface is now ready for the application of special patinas for bronze. A sealer is then used to protect the surface against further aging or is left untreated to continue the process as it would do naturally.

NL: Door het ademende karakter van de A1 zal het object inderdaad vloeistoffen opnemen en in de A1 trekken, dit zal je helaas blijven je zien, maar zal na verloop van tijd wel enigszins vervagen, helaas is dit ook niet met een vochtige doek op te lossen. Wij kunnen je hier geen simpele oplossing voor bieden. Wellicht zou het een oplossing kunnen zijn, om het werk met een watergedragen verf over te schilderen, zodat je de vochtplek niet meer ziet.

EN: Due to the breathable character of the A1, the object will absorb liquids and draw them into the A1. Unfortunately, you will continue to see this and this cannot be solved with a damp cloth, but will fade somewhat over time. We cannot offer you a simple solution. Perhaps it could be a solution to paint the work over with a water-based paint, so you no longer see the damp spot.